Installation
Before install MyCMS, you should check the Requirements
Step 1: Download and Extract
Download and unzip MyCMS from: GitHUB
- If you will be uploading MyCMS on a remote webserver, download it with your browser and extract it locally.
- If you are going to use FTP, download MyCMS with your browser, extract it and upload the cms to the remote webserver.
Now you need to use composer for install libraries:
Open the terminal and write: composer install in the root folder where is the
"composer.json" file.
-Not recommended but if you can't install or use composer, download this zip file and place the "vendor" folder
where is the composer.json file.
After the upload of all things set the permission to write and read, if you use linux type: "chmod
755 -R website_root_folder_path". Replace "website_root_folder_path" with the path.
The installation and configuration folder(inside "src/App") need of the 777 permission for write the configuration file.
If you use a ftp program or other, check how set the permissions.Step 2: Create Database
Using phpMyAdmin
Open phpMyAdmin on your web server, if you want test it locally, download phpMyAdmin extract it, and place it in your webserver
root directory.
If you have downloaded phpmyadmin, rename phpmyadmin folder in only: "phpmyadmin" and the navigato
to: http://localhost/phpmyadmin/index.php, or
"your webserver url/phpmyadmin/index.php".
Next, go to database tab and make new database, call it for example: "website" or "mycms".
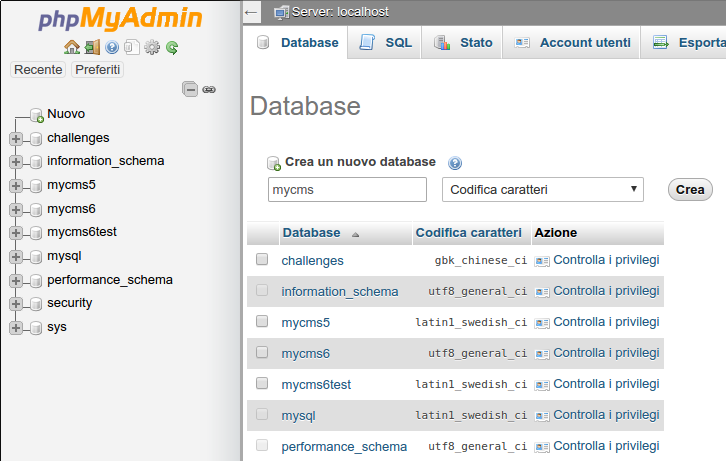
When you have created a new database the cms installation can start.
Step 3: Cms installation & Admin account creation
Navigate to your website url or if you host it locally click simply here: http://localhost.
Now you can see the installation page:
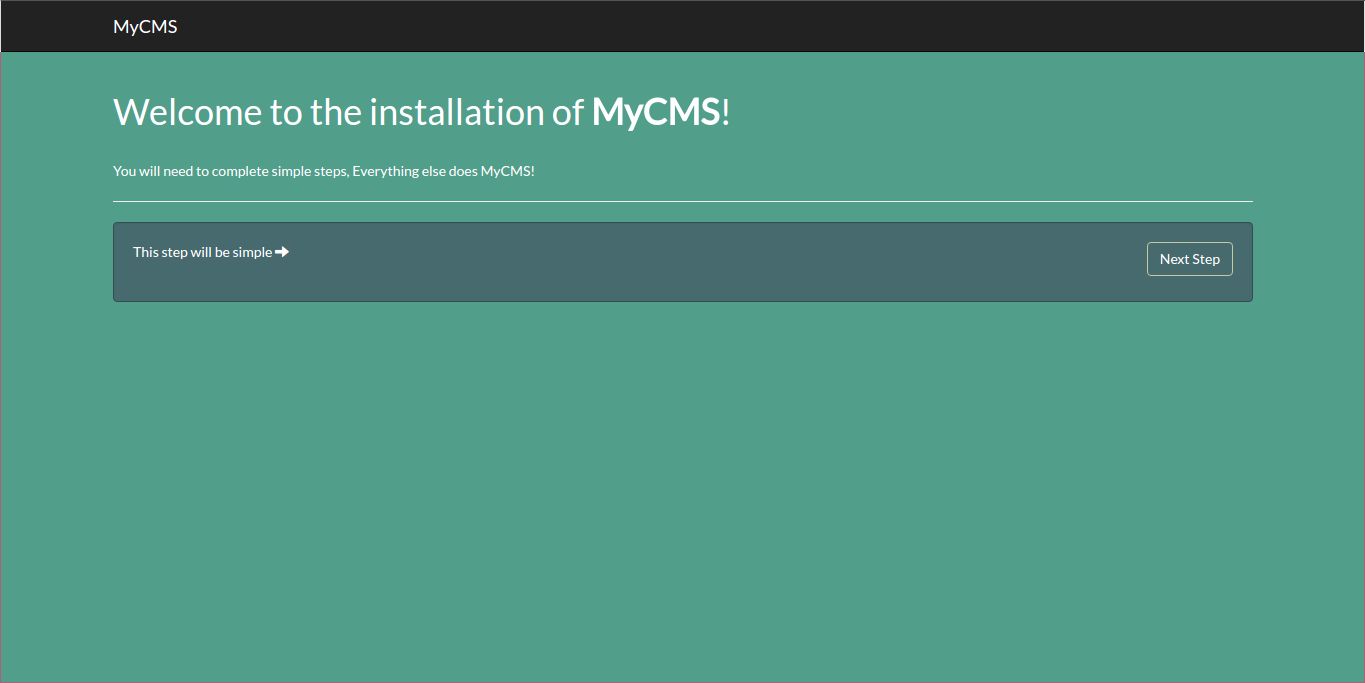
For the first step you need click the next step button.
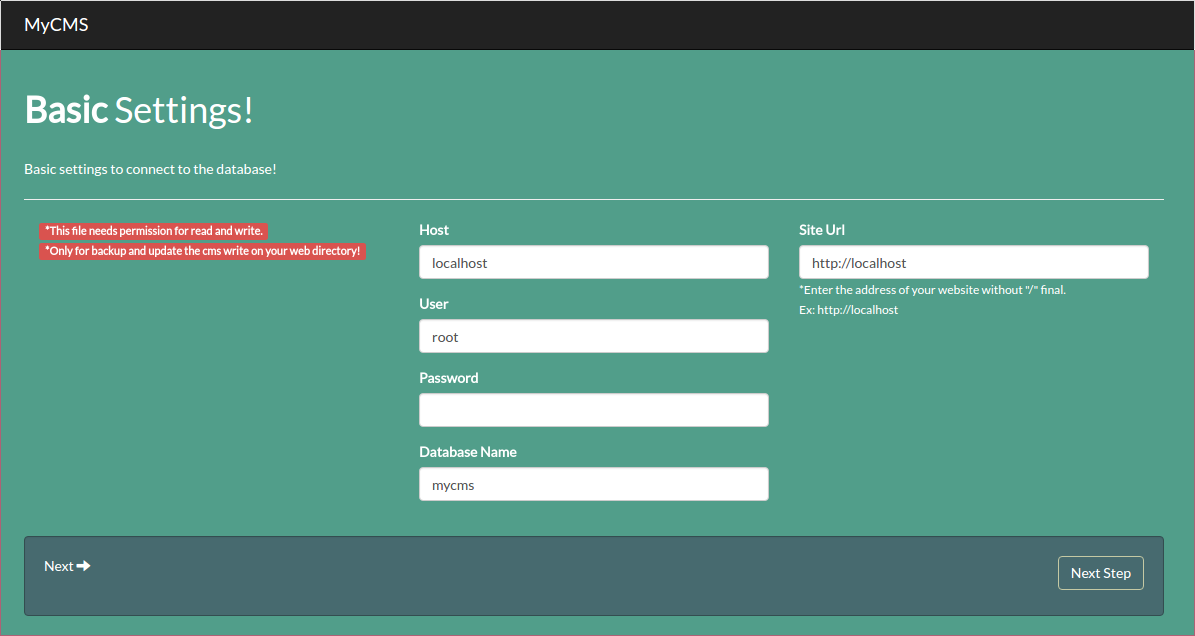
In the second step, you need to fill all fields:
- Host: this is the host where is the database.
- User: the username used for access to the database.
- Password: the password for access to the database.
- Database name: the name of the database created earlier.
- Site url: your website url.
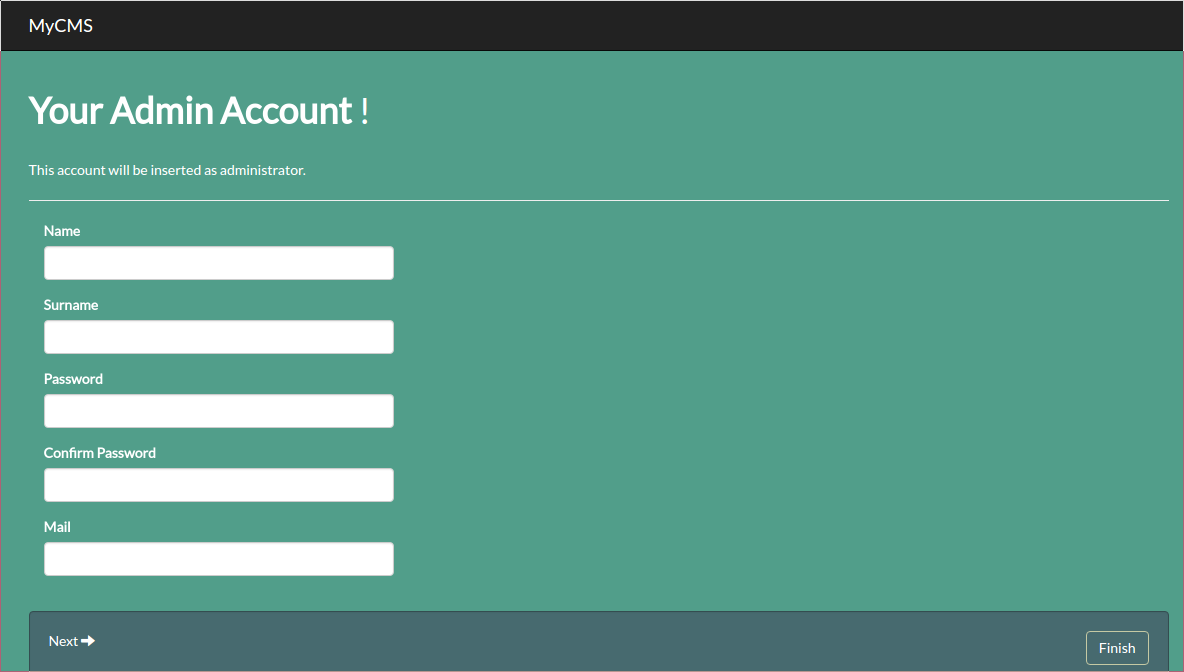
For the third step, you need fill all field with your personal information, this is the admin account
With this account you can access to all parts of your website, keep it private!
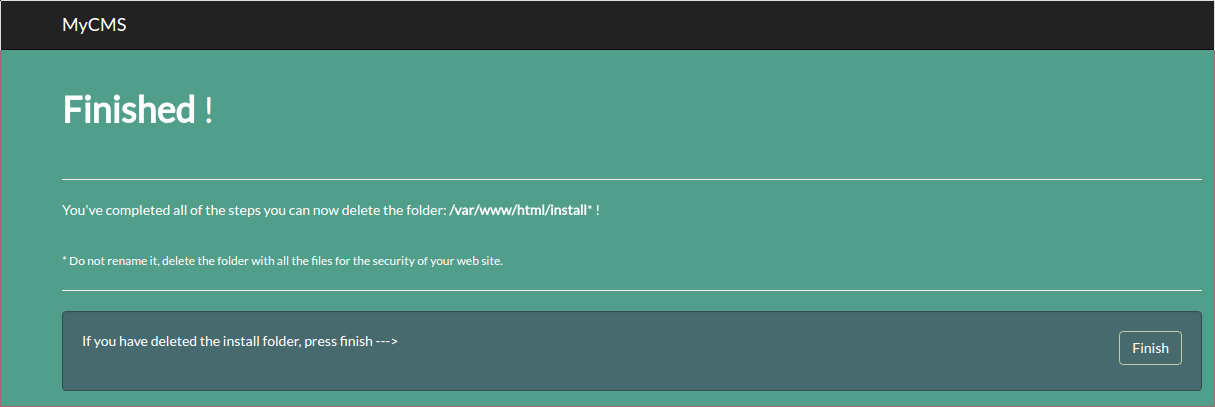
Now you are in the last step.
In this step you need delete the installation folder on the website root folder.
Next Step - MyAdmin